윈 도 우 Clone a Hard Drive to SSD in Windows with MiniTool Partition Wizard
2019.09.26 18:24
SSD allows outstanding merits such as fast read-write speed, low consumption, etc. Therefore, clone the hard drive to SSD will significantly improve computer speed.
Reason for clone hard drive to SSD as follow:
1. Upgrade old hard drive.
2. Expand a small hard drive.
3. Make a backup.
4. Improve performanc.
To estimate the time to clone your hard drive, the single most critical factor is to know how much data is on the disk that will be cloned. The more data, the longer it takes.
In Addition, determining the method used to clone the drive is also critical.
For instance, cloning a disk to multiple systems need two steps, includes clone the original disk to a data repository, and cloned to the bare disk.
If you clone a hard drive in Windows 7/8/10 for a computer upgradation, you can directly clone the original disk to another disk like SSD in the same computer. it doesn’t have an intermediate step.
The last factor is the hard drives’ type. And sometimes, you also should consider the specifications of the system. The speed of the older disk could be the determining factor during a direct drive-to-drive transfer if you use an older drive technology to clone to a newer one.
In conclusion, the time to clone a hard drive to SSD is based on your actual situation and it couldn’t easily be estimated. In the following sections, we will show you how to clone a hard drive in Windows 7/8/10 to SSD in the same computer effectively.
As a disk cloning tool,MiniTool partition wizard, is able to clone disk. What's more, it has the ability to mange the partitions on the destination disk, no need to worry that your SSD does not match for the HDD.
Get a free download of MiniTool Partition Wizard and try its Copy Disk feature now:
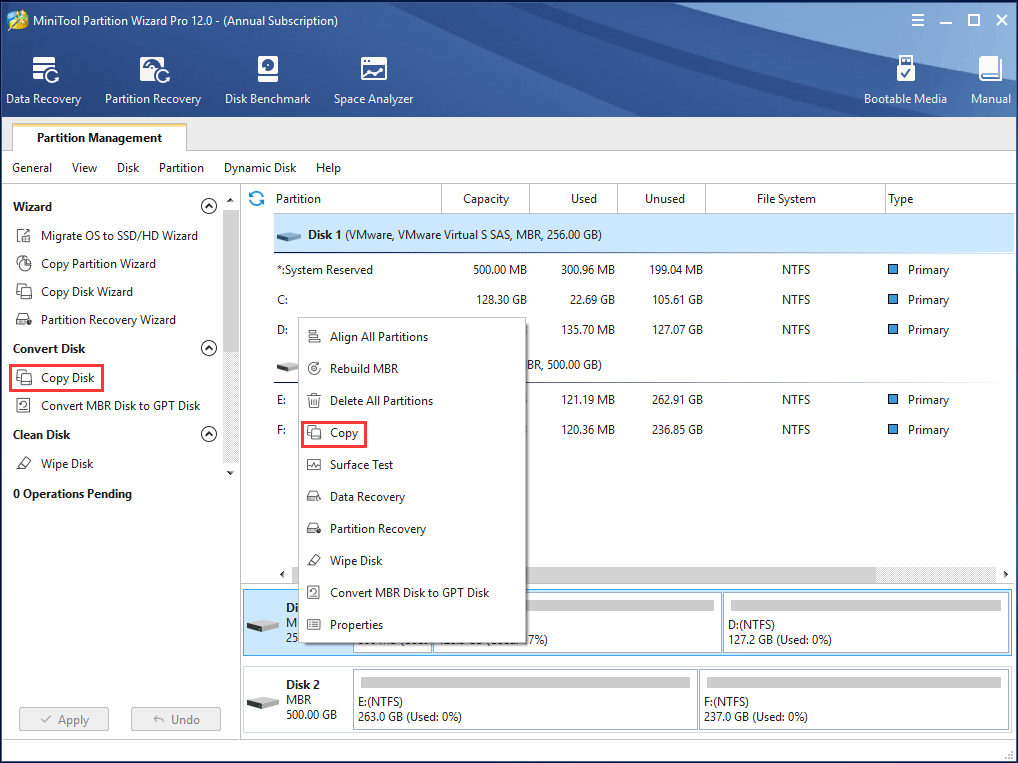
Step 1: Disk Copying Process
1. From the available disks, choose the hard drive you want to clone.
2. Click Copy Disk from Convert Disk in the action panel or right-click on the source disk to choose the Copy feature.
Step 2: Select Target Disk
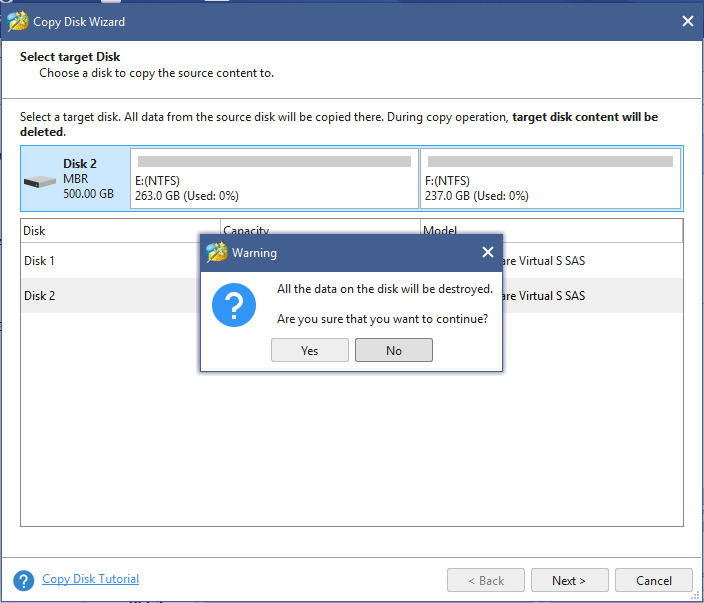
1. Choose the target disk to copy the content of the source disk.
All existing data on the target disk will be destroyed.
All data on the source disk will be copied.
2. Click Yes to continue the process.
Step 3: Select Partition Options
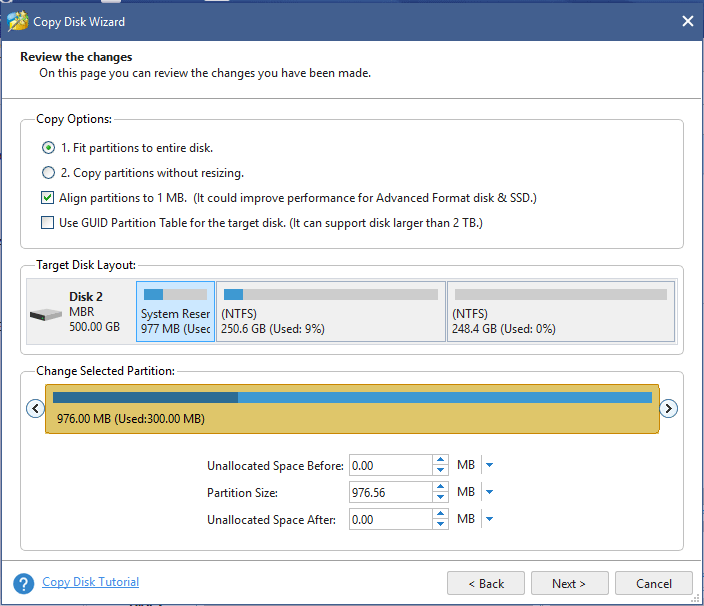
1. Select whether to Fit partitions to entire disk(the target disk partition size will be adjusted automatically to fit the entire disk) or Copy partitions without resizing (the size of the source disk partitions will be used), according to your needs. In this example, we will use Fit partitions to entire disk.
2. To improve the performance of your SSD, check the align your partitions to 1MB option.
3. (Professional Edition only) To clone your system disk to the SSD with GPT partition style, check the Use GUID Partition Table for the target disk option.
Step 4: Boot from the Destination Disk
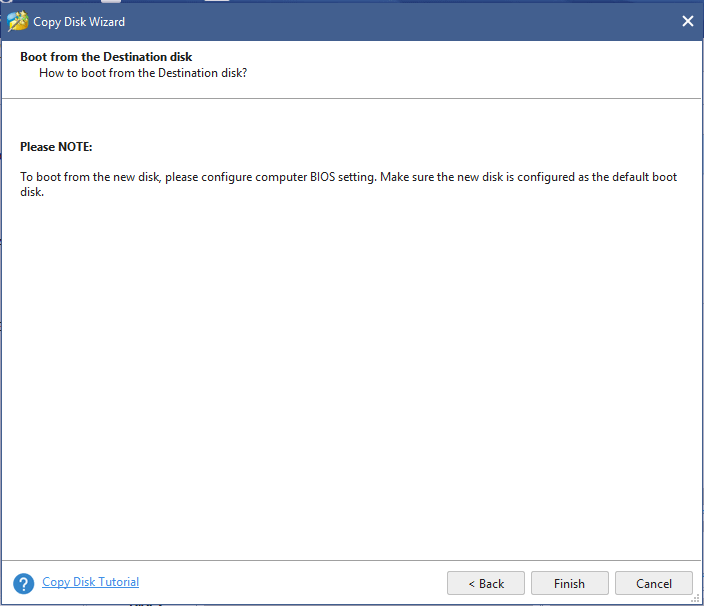
1. To boot your computer from the new disk, change the boot order in the BIOS settings.
2. To only copy the hard drive, ignore this warning.
Step 5: Apply the Copied Partitions
1. Preview and ensure all partitions are being copied to your new SSD.
2. If everything is okay, click Apply.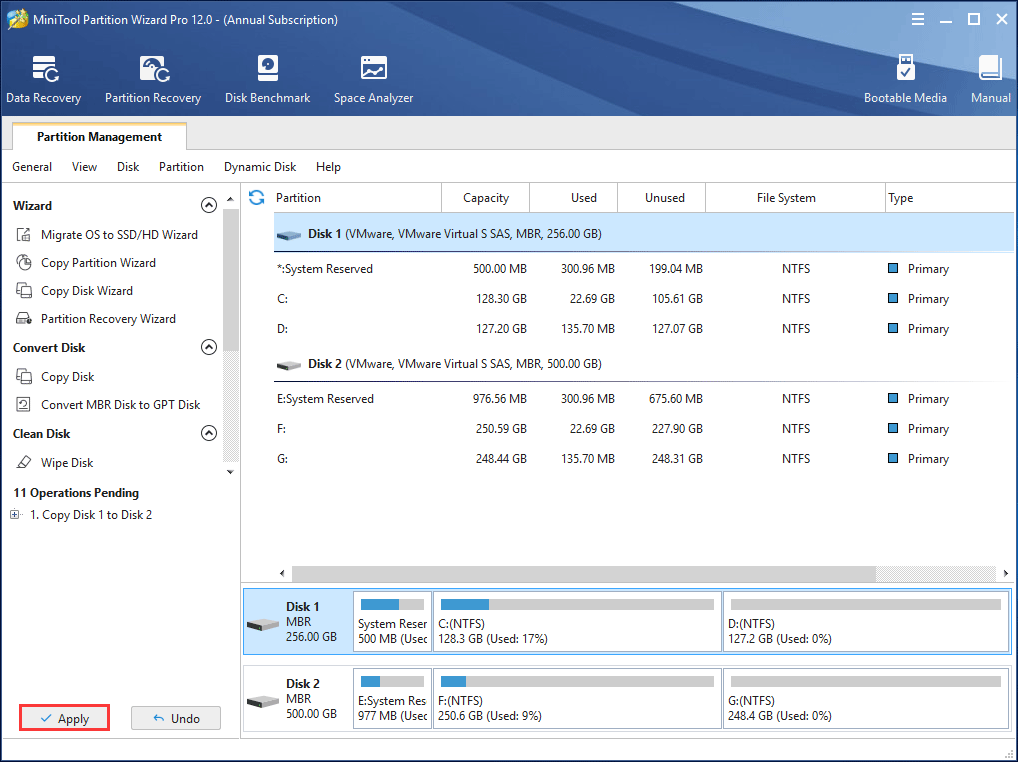
Congratulations! You’ve cloned your hard drive to SSD withour reinstalling Windows and customizing your apps, and you’re ready to enjoy a faster and quieter system disk.
댓글 [7]
-
ehdwk 2019.09.26 18:27
수고하셨습니다. -
skylly 2019.09.26 18:57
Thanks for your support.
-
skylly 2019.09.26 18:53
Sorry, I'm not good at Korean, so I chose to express the article using English. If this causes any inconvenience, I am sorry about that.
In fact, MiniTool Partition Wizard 11.5 version has released Korean language. if you want to switch language, you can download the English file and translate into your native language according to interface, an click the ‘VIEWS’< choose ‘LANGUAGE’.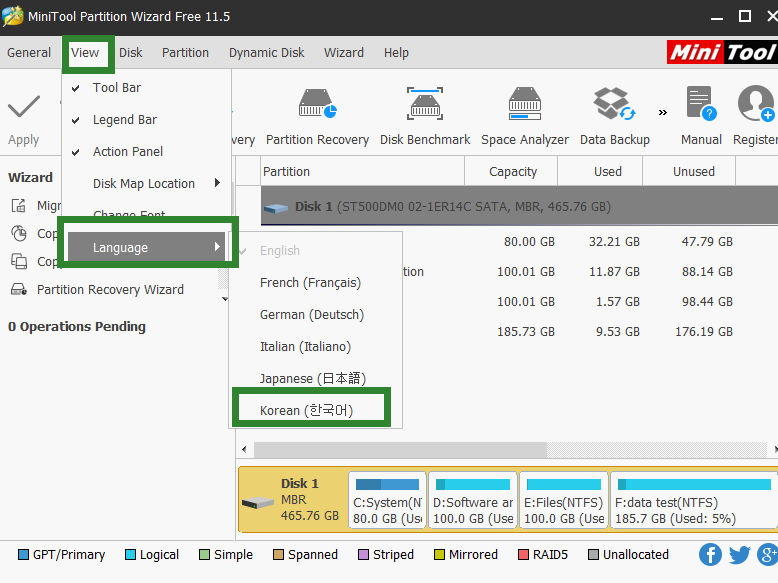
-
kwoods 2019.09.26 23:00
Ohh, what a pleasant surprise to see English here!...
And yet I wonder what you mean by "I'm not good at Korean.,
please advise us about that. Thanks for sharing this info, by the way. -
qnd 2019.09.26 19:37

-
에이리언 2019.09.27 07:55
All this time I used MiniTool Partition Wizard, I didn't know it had a clone copy. Thank you for your info.
-
그냥그렇다 2019.09.27 11:40
I don't know what it's all about.
